> ## Documentation Index
> Fetch the complete documentation index at: https://ppio.com/docs/llms.txt
> Use this file to discover all available pages before exploring further.
# Microsoft Word 接入 PPIO LLM API
## 教程概述
作为办公软件的"国民级应用",Microsoft Word 已经陪伴全球用户走过近 40 个年头。从最初简单的文字录入工具,到如今集智能写作、云端协作、跨平台编辑于一体的生产力利器,它始终在重新定义"文档创作"的可能性。
现在注册 PPIO,立即获取千万 token 免费额度,体验如何搭建属于你的"智能 Word 续写助手"。
下方教程包含完整接入方案(含密钥配置),3 分钟开启「Microsoft Word + PPIO 高性能 API」的进阶模式,让你的文档处理效率直接起飞 🚀
## 1. 配置前置条件
(1)获取 API 接口地址:`https://api.ppio.com/openai/v1/chat/completions`。
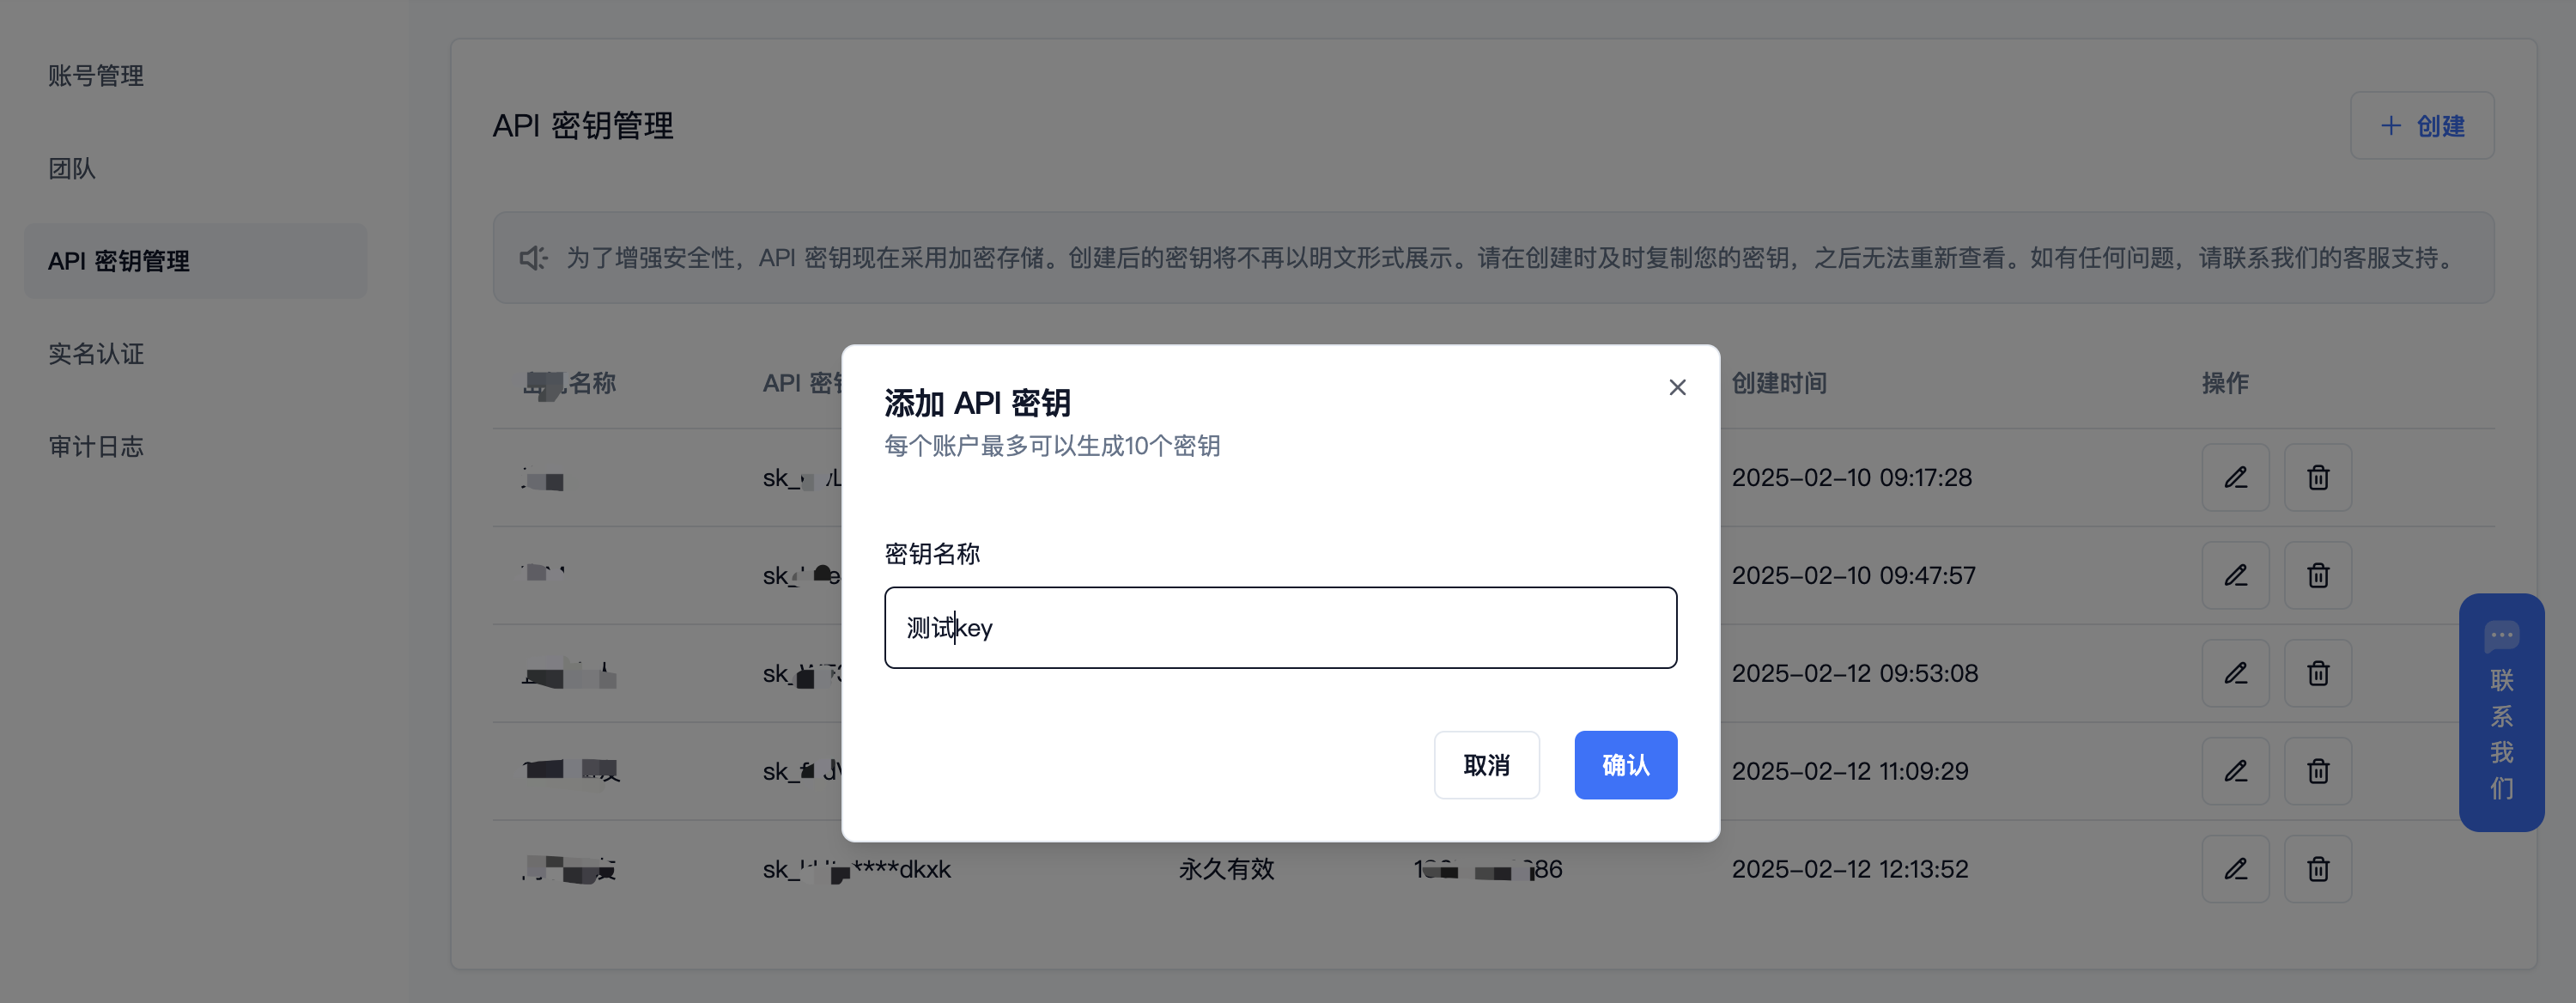
(2)登录派欧云控制台 [API 秘钥管理](https://ppio.com/settings/key-management) 页面,点击创建按钮。
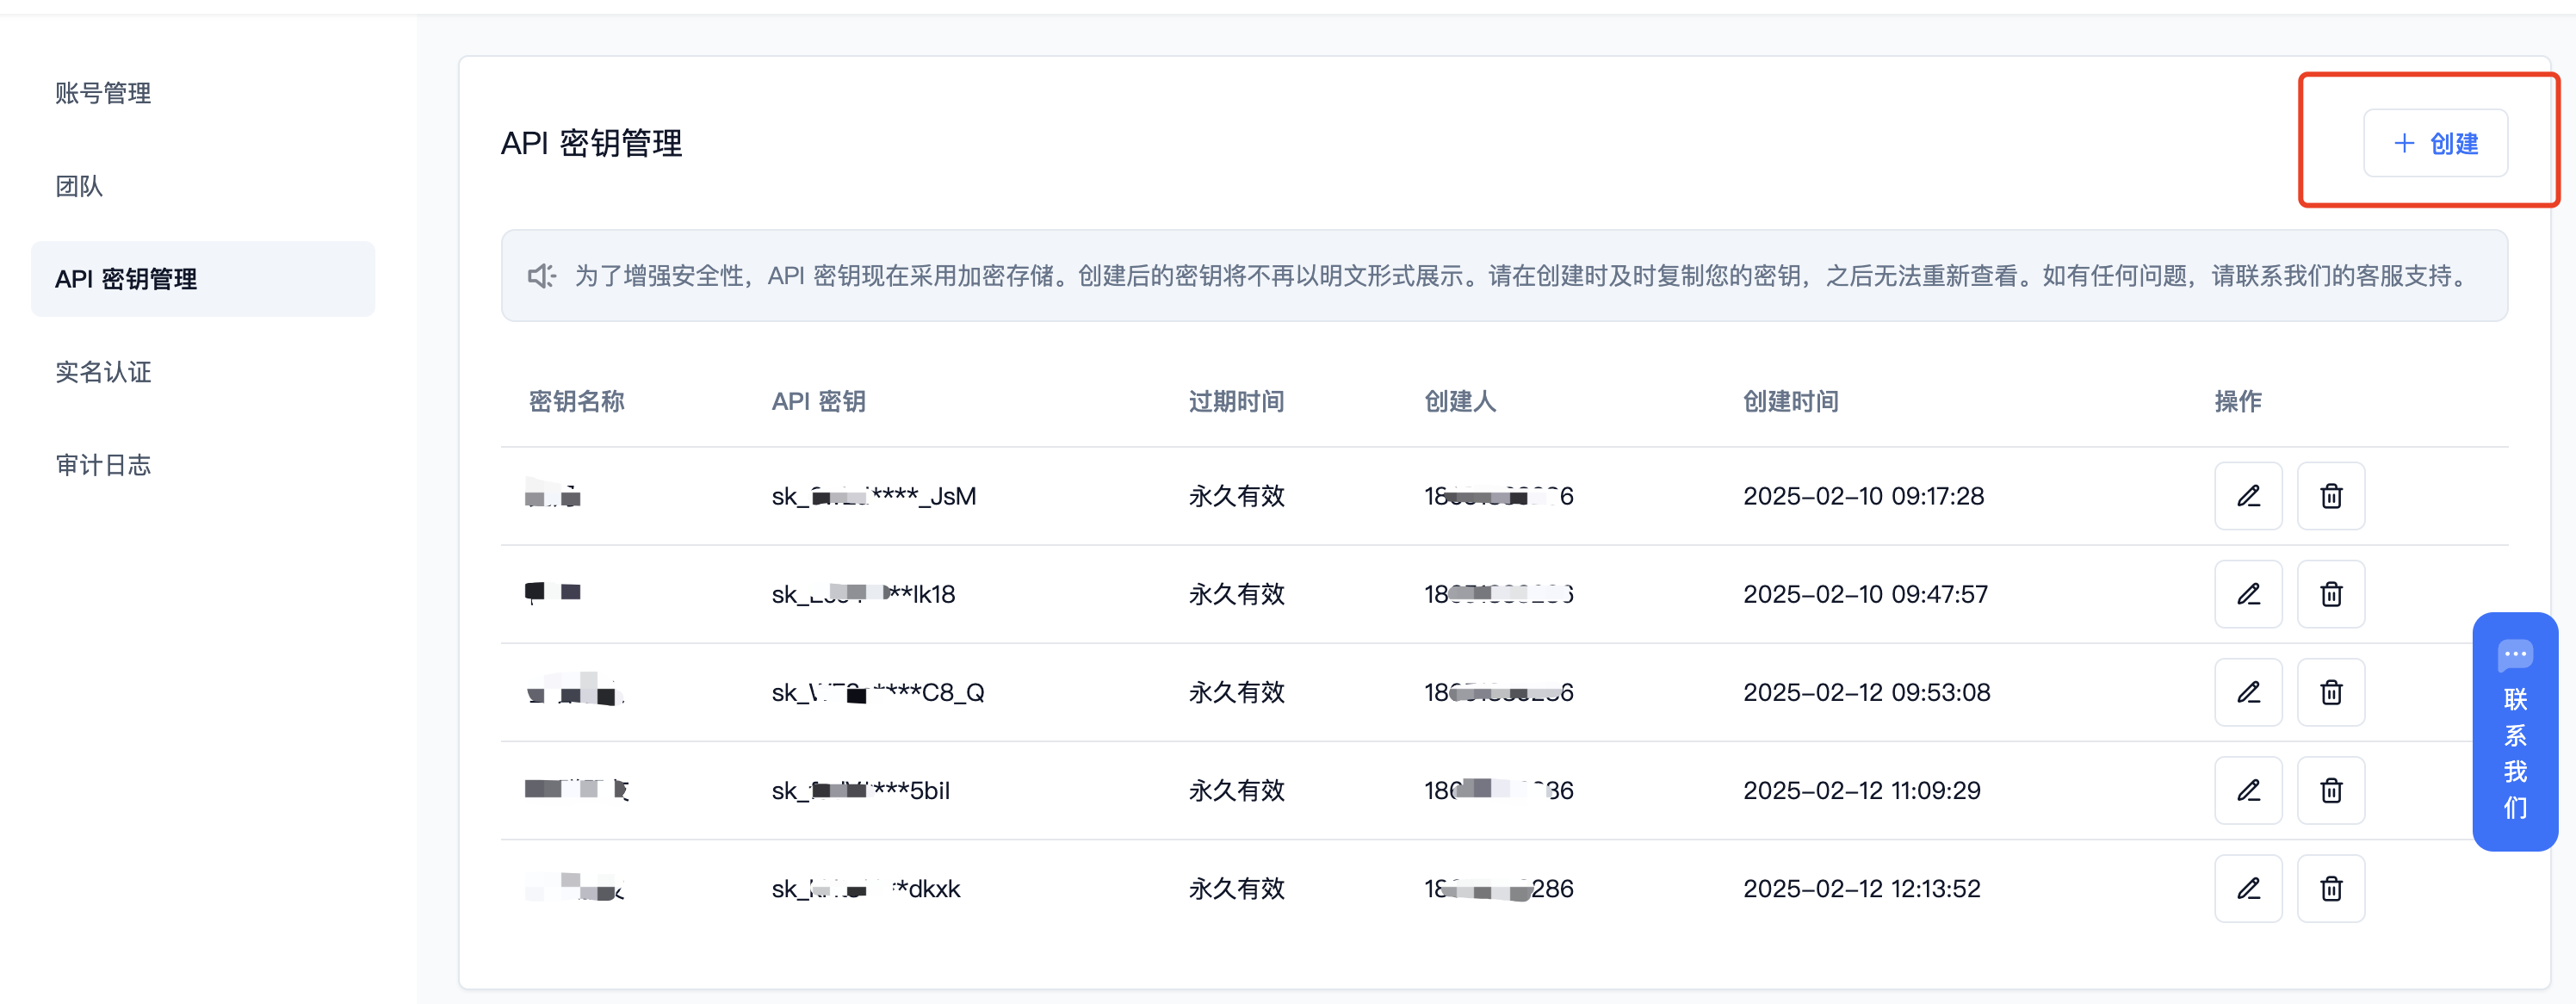 (3)生成并保存 API 秘钥
秘钥在服务端是加密存储,请在生成时保存好秘钥;若遗失可以在控制台上删除并创建一个新的秘钥。
(3)生成并保存 API 秘钥
秘钥在服务端是加密存储,请在生成时保存好秘钥;若遗失可以在控制台上删除并创建一个新的秘钥。
 (4)获取需要使用的模型 ID。**推荐 DeepSeek 系列模型:**
* DeepSeek R1:deepseek/deepseek-r1/community
* DeepSeek V3:deepseek/deepseek-v3/community
其他模型 ID、最大上下文及价格可参考:[模型列表](https://ppio.com/model-api/pricing)
## 2. 在 Word 创建开发工具
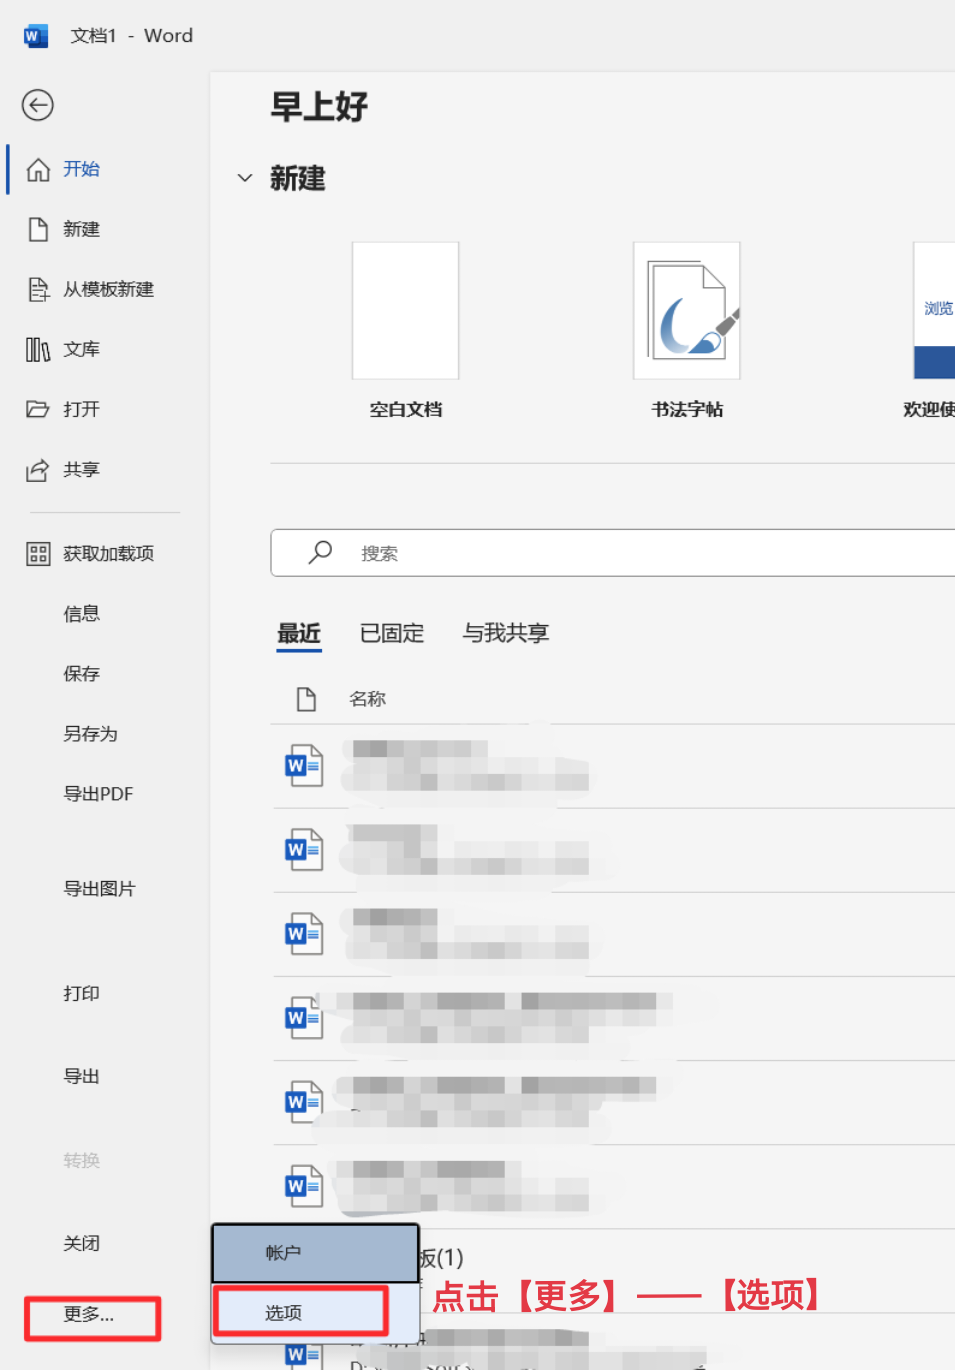
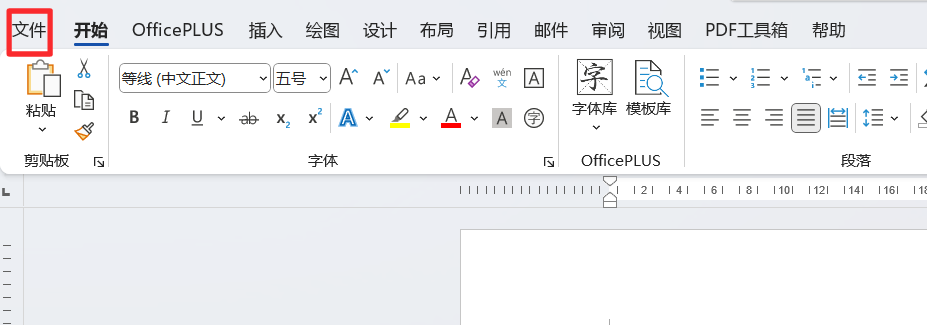
(1)点击【文件】
(4)获取需要使用的模型 ID。**推荐 DeepSeek 系列模型:**
* DeepSeek R1:deepseek/deepseek-r1/community
* DeepSeek V3:deepseek/deepseek-v3/community
其他模型 ID、最大上下文及价格可参考:[模型列表](https://ppio.com/model-api/pricing)
## 2. 在 Word 创建开发工具
(1)点击【文件】
 (2)点击【更多】——【选项】
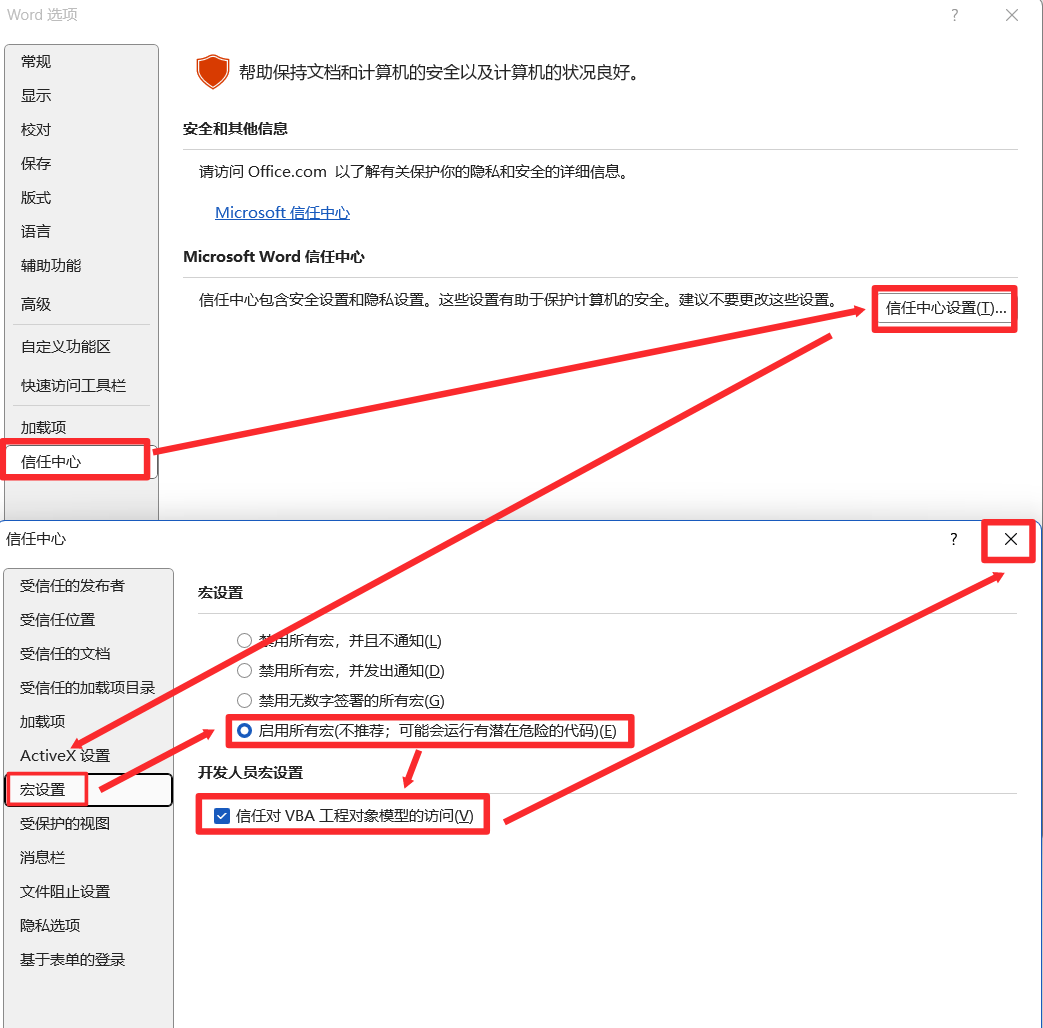
 (3)点击【信任中心】——【信任中心设置】;在信任中心页面点击【宏设置】——【启用所有宏】——【信任对 VBA 工程对象模型的访问】,都勾选上即可关闭。
 (4)回到主界面,再点击【文件】——【更多】——【选项】
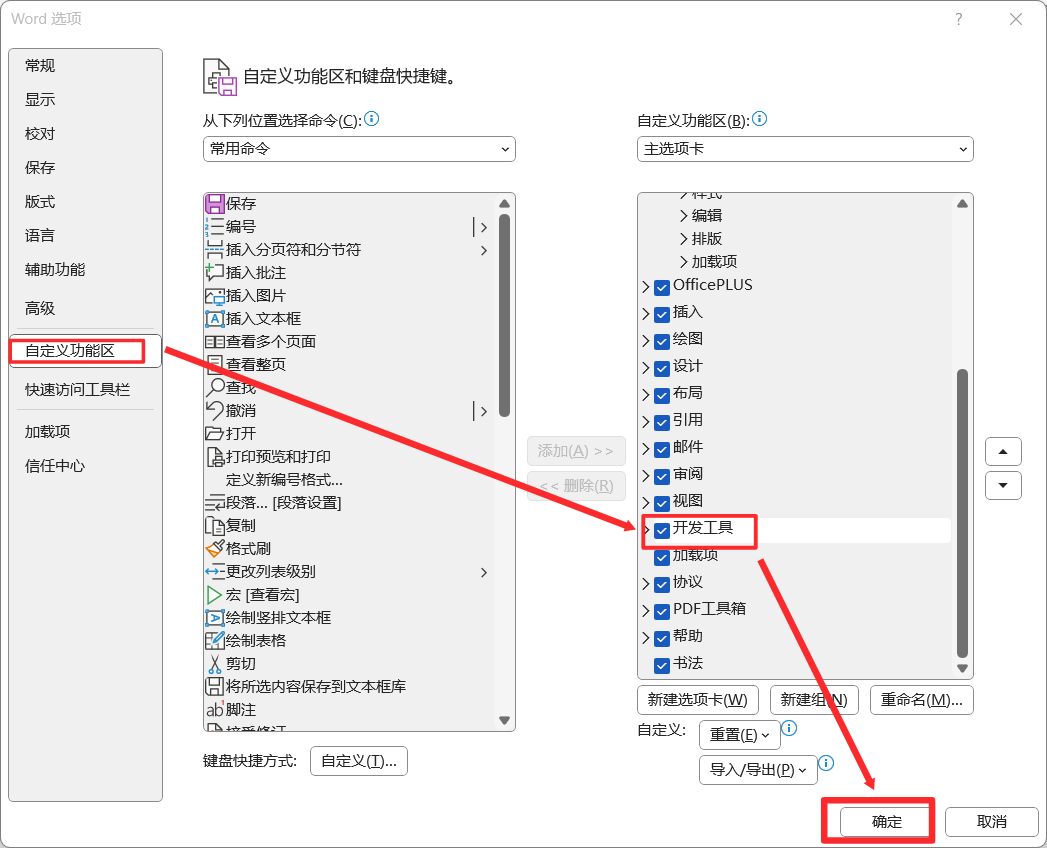
 (5)打开【自定义功能区】——勾选【开发工具】——【确定】
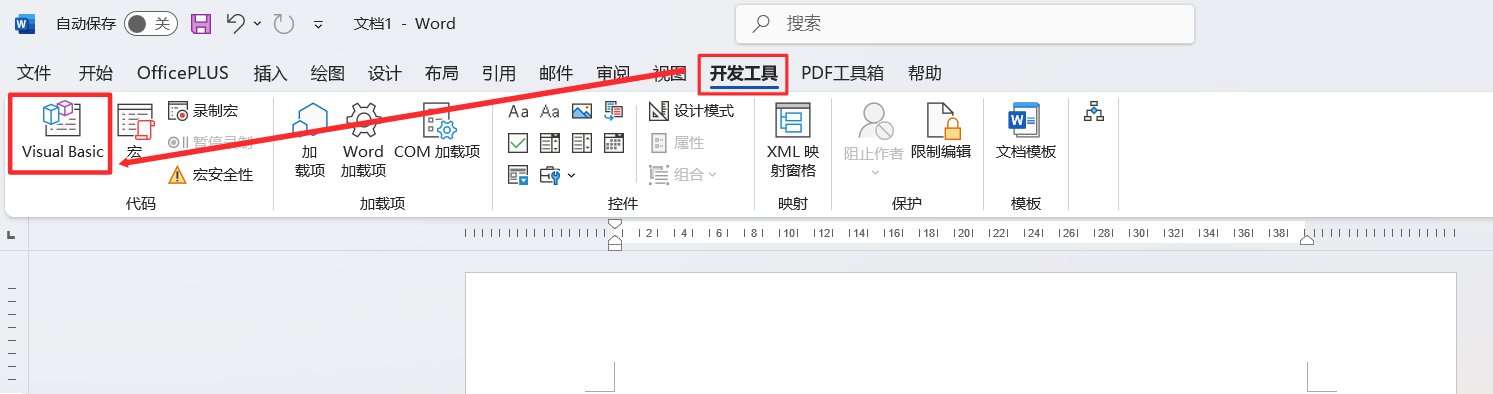
 (6)回到主界面,点击【开发工具】——【Visual Basic】
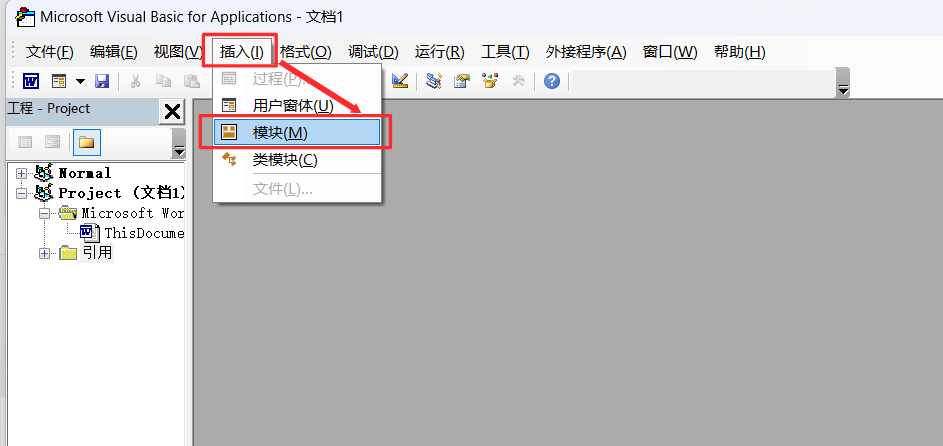
 (7)点击【插入】——【模块】
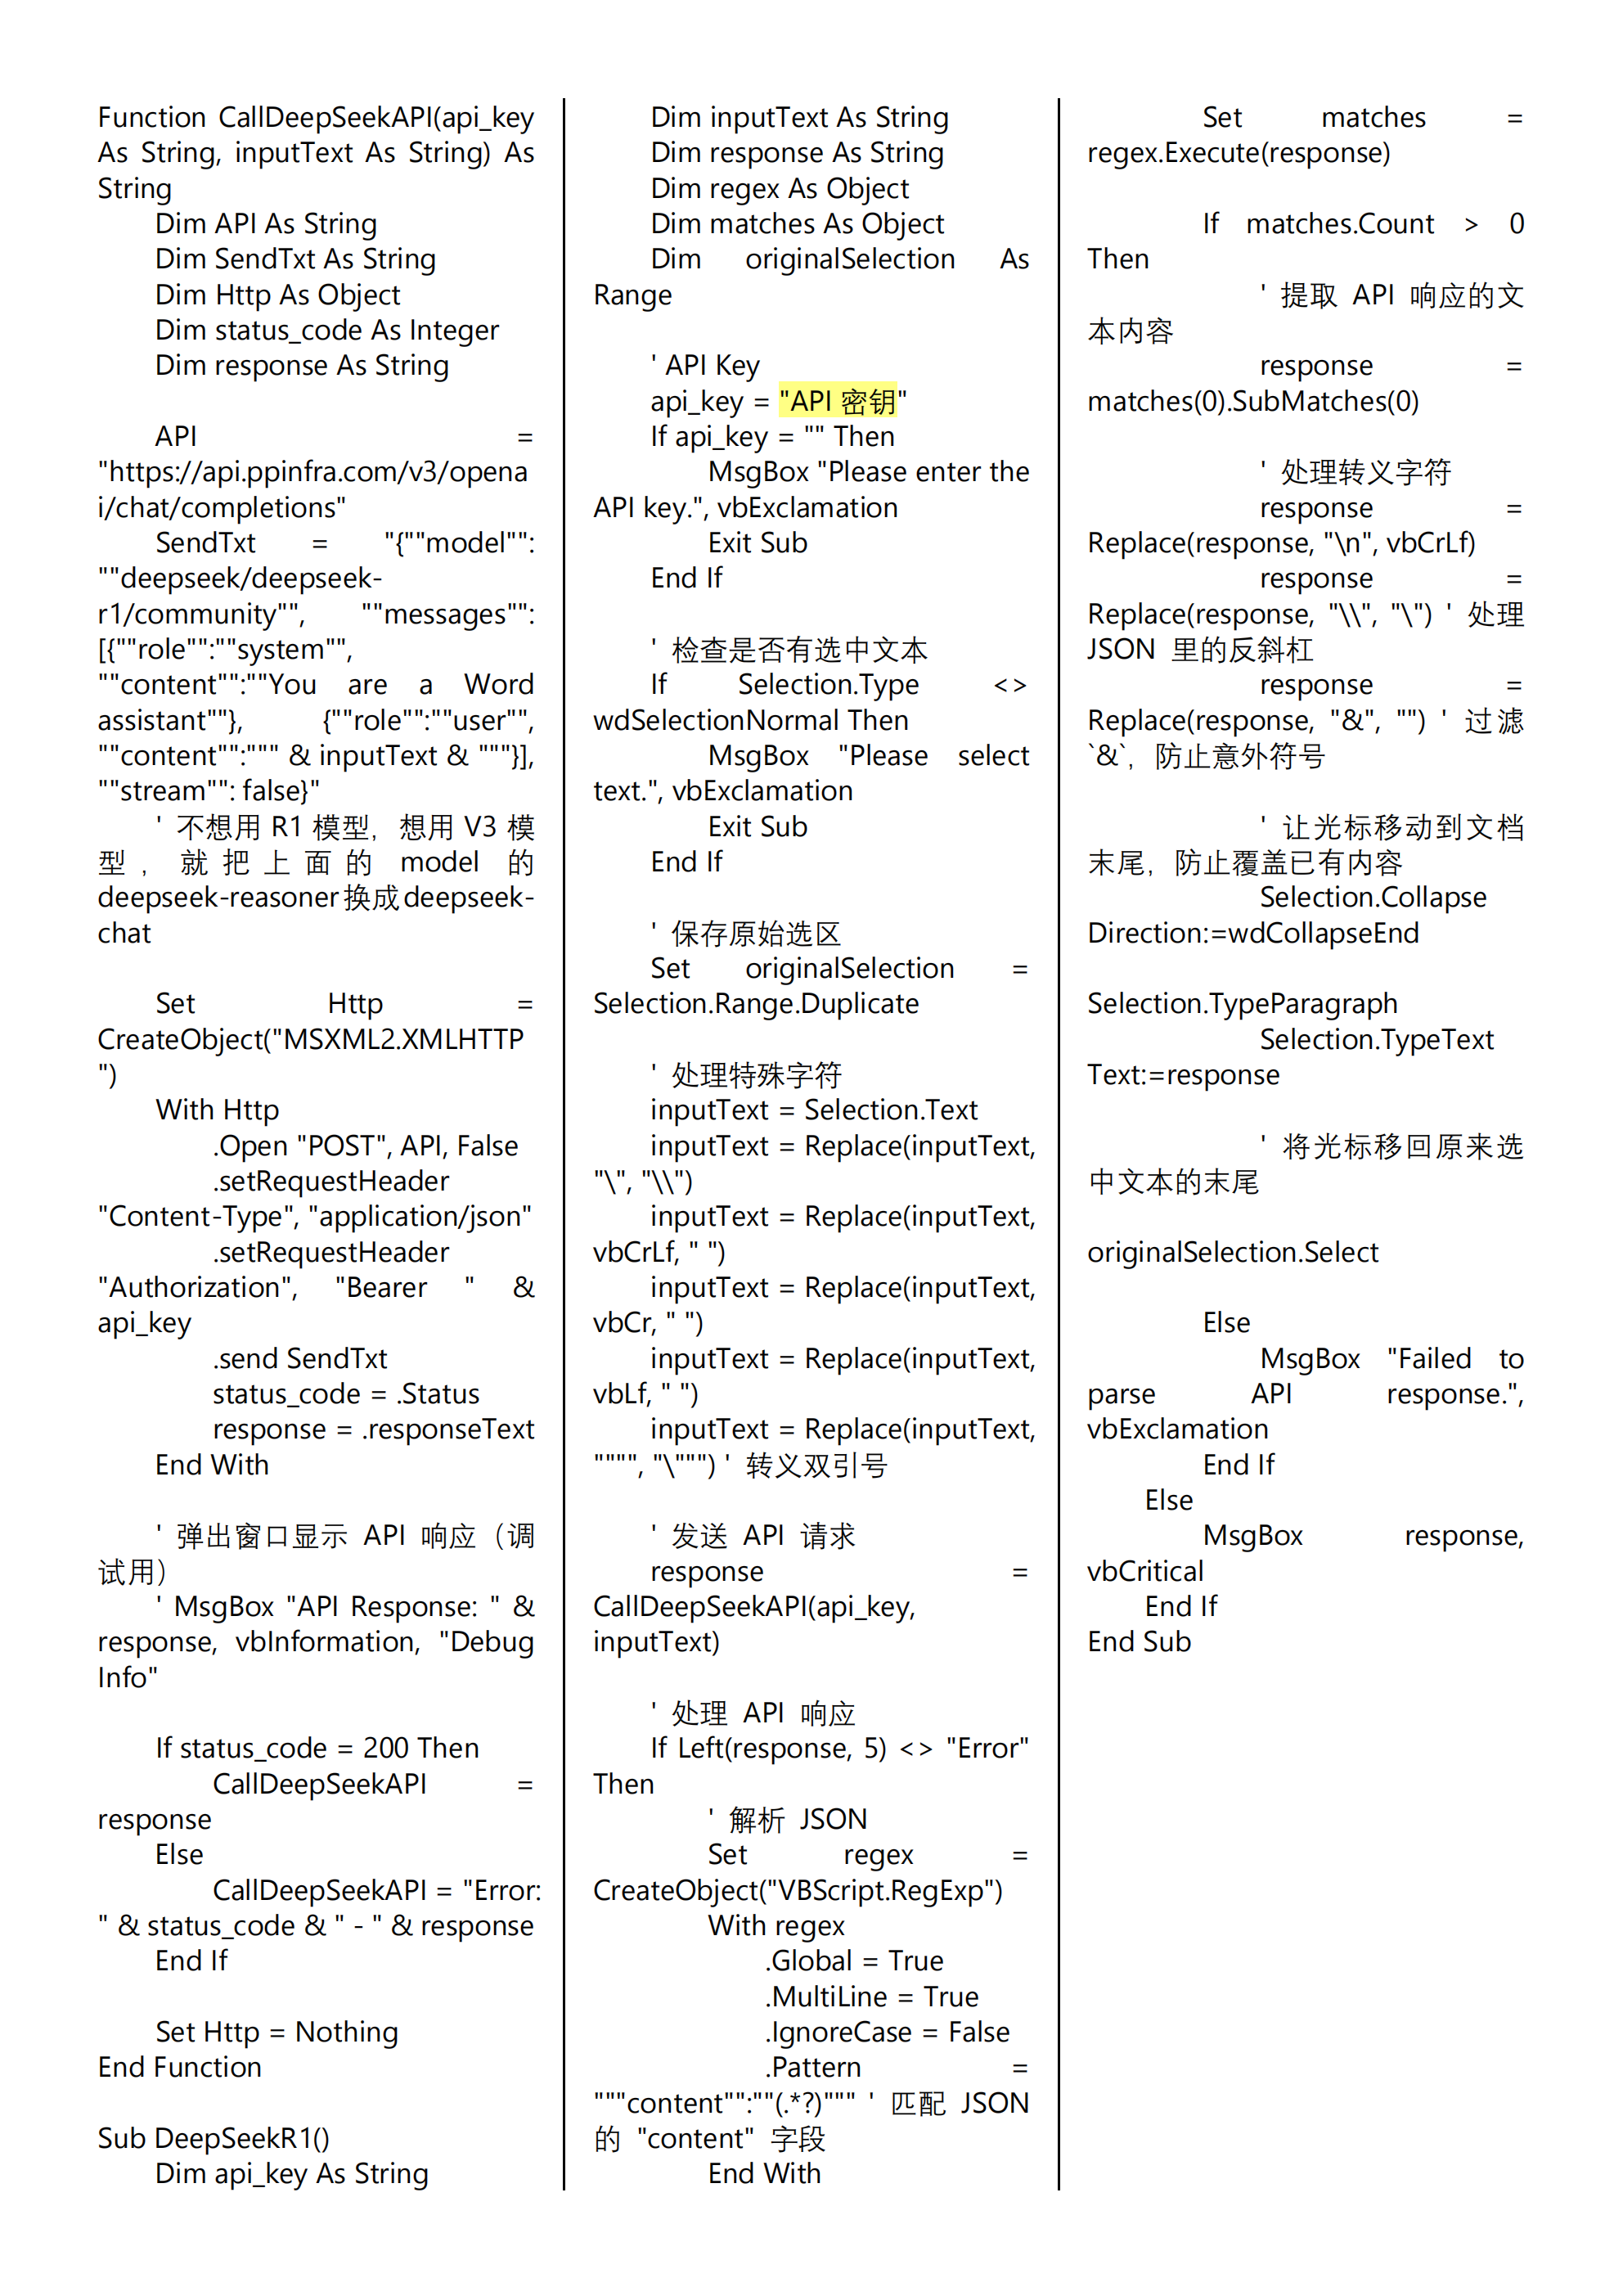
 (8)复制代码在命令框仅需修改【api\_key = " " 】,在" "中填入 1(3)中保存的 API 密钥
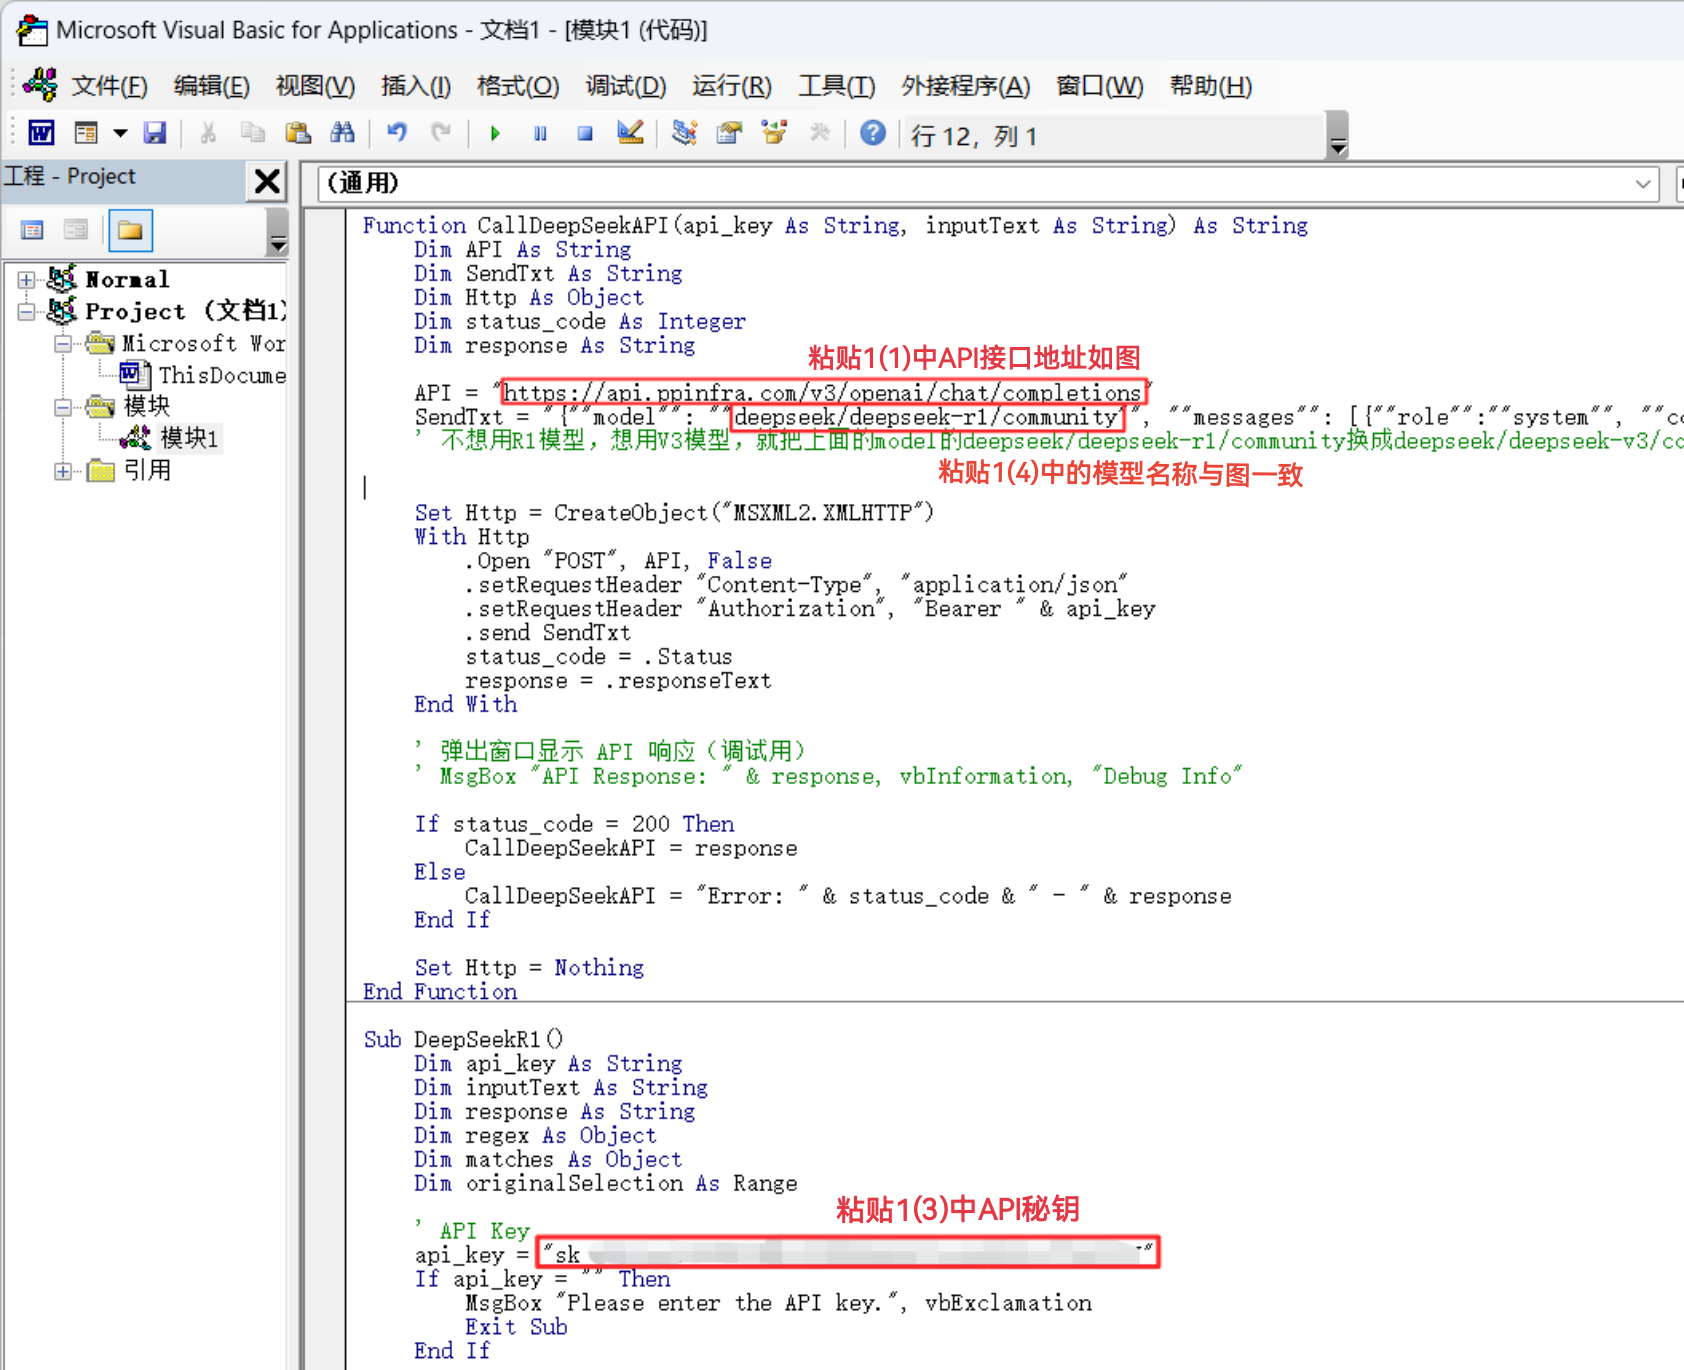 全部代码如下图:
 ## 3. 配置开发工具
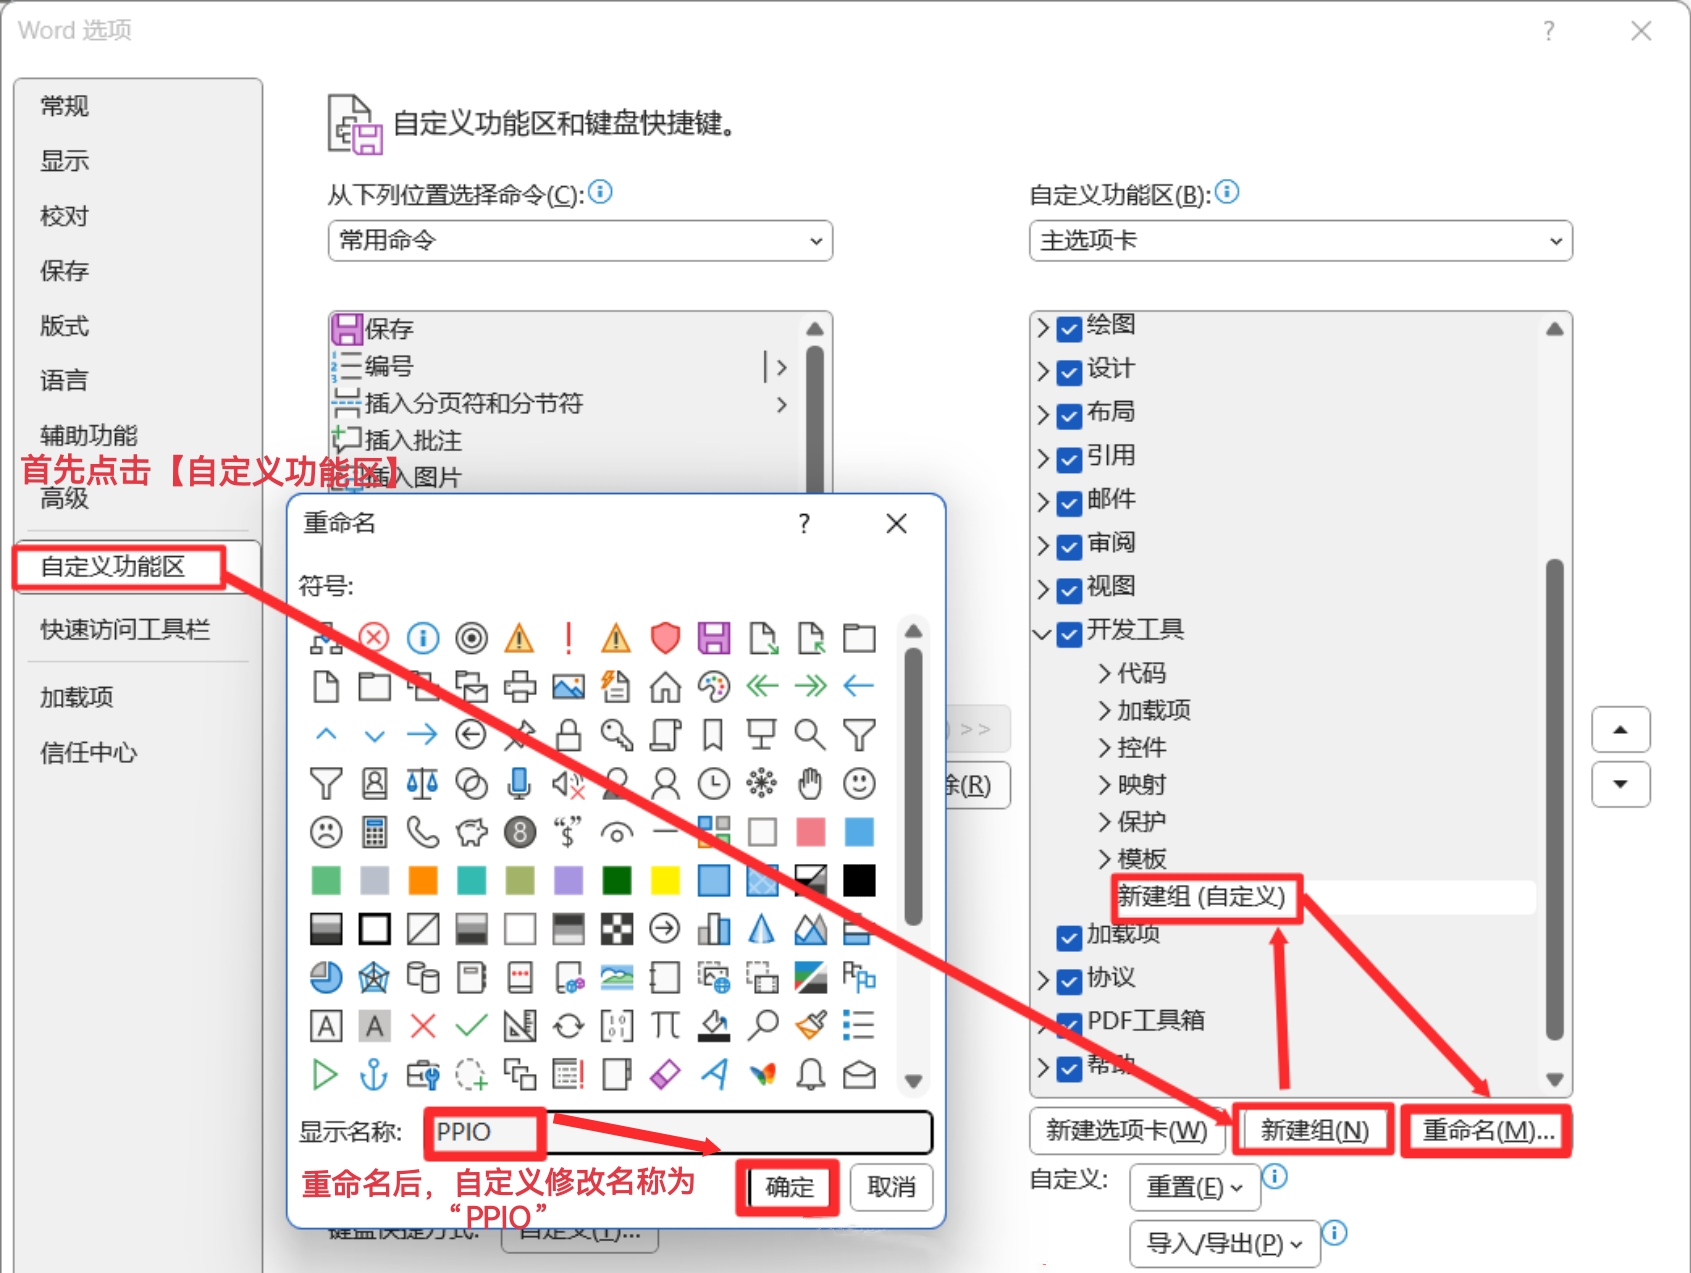
(1)点击【自定义功能区】——【新建组】,点击【新建组(自定义)】——【重命名】;在显示名称处修改自定义名称为“PPIO”,【确定】修改名称
## 3. 配置开发工具
(1)点击【自定义功能区】——【新建组】,点击【新建组(自定义)】——【重命名】;在显示名称处修改自定义名称为“PPIO”,【确定】修改名称
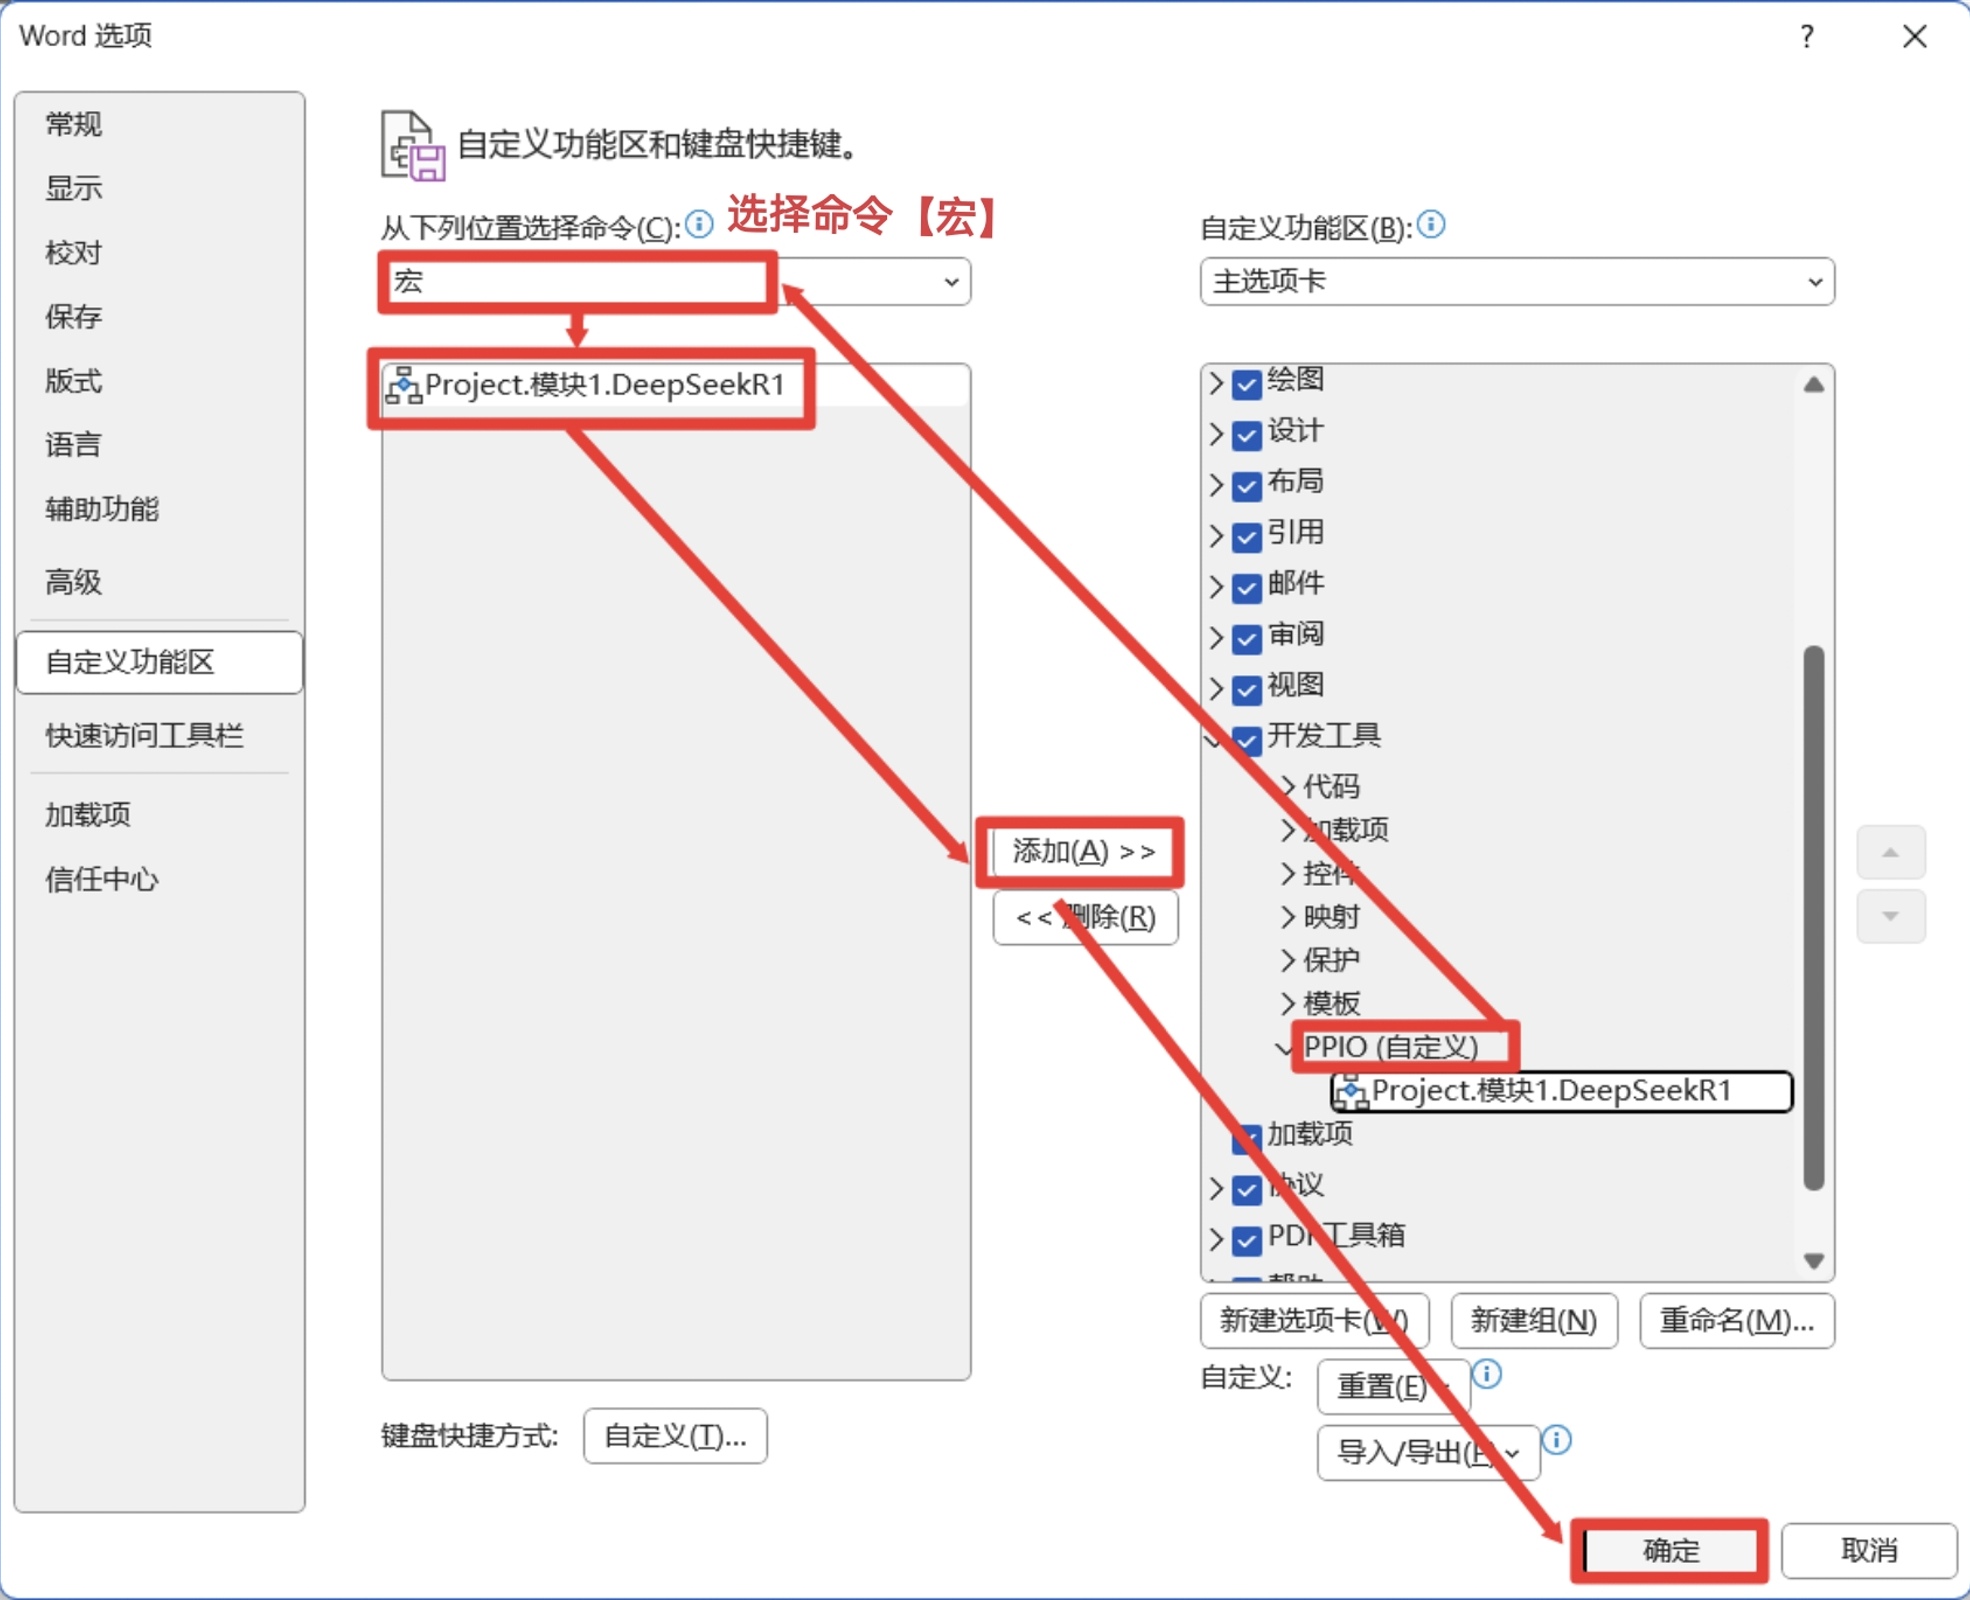
 (2)点击新建的【PPIO(自定义)】选择命令下拉选择【宏】——【Project 模块 1】——【添加】——【确定】
 (3)回到主界面,选中需要续写的文字,点击刚刚创建的模块,word 中会自动在下列行中输出 PPIO 的 DeepSeek-R1 输出的续写结果。
 ## PPIO 全新福利重磅来袭 🔥
🎁 新人专享:立即使用邀请码【VOJL20】完成注册并实名认证获得5元代金券。
🎉限时活动:分享邀请链接邀请好友注册,邀请返利详情请查看 [邀请返利](https://ppio.com/settings/invitation-rebate)。
## PPIO 全新福利重磅来袭 🔥
🎁 新人专享:立即使用邀请码【VOJL20】完成注册并实名认证获得5元代金券。
🎉限时活动:分享邀请链接邀请好友注册,邀请返利详情请查看 [邀请返利](https://ppio.com/settings/invitation-rebate)。